|
-
September 22, 2025, 08:35:39 pm

- Welcome, Guest
News:Official site launch very soon, hurrah!
|
1
on: August 27, 2025, 08:58:00 am
|
|
Started by Dakusan - Last post by Dakusan
|
Tmux is a great alternative to gnu screen. I've previously posted my cygwin tmux config in 2020, and I figured I'd update with my additions since then, including running under real linux. So here it is. Its features include: - Uses ctrl+a, like gnu screen, instead of ctrl+b
- Mouse interaction is enabled
- Tab bar/windows:
- Current tab is highlighted in cyan
- Cycle through tabbed windows with a click on its tab or ctrl+shift+alt+arrow_keys
- Reorder tabbed windows with a drag of its tab
or alt+arrow_keys - ctrl+a,/ to rename a tab on the tab bar
- Create new window with ctrl+a,c
- Panes
- Create split panes with vertical=ctrl+a,| and horizontal=ctrl+a,- (and start in the cwd)
- Move around panes with click or ctrl+shift+arrow_keys
- Resize panes by dragging on the separator bar or use alt+shift+arrow_keys
- Swap panes directionally with alt+arrow_keys
- Panes automatically resize to fit OS window
- Clipboard/highlighting
- Copy text to clipboard by highlighting it
- Paste from clipboard with right click
- Middle mouse button+drag highlights and copies too. I did this since nano takes over normal mouse click+drag.
- Copy mode
| Key* | Action |
|---|
| Ctrl+PageUp | Start copy mode, scroll page up | | Ctrl+PageDown | Start copy mode | | Enter | Copies selected text to clipboard and ends copy mode | | Shift+(Left/Right) | Starts selection mode on previous/next character (or continues selection navigation like normal left/right) | | Escape | If something is selected, end current selection. Otherwise, exit copy mode | | Ctrl+(Home/End) | Go to top/bottom of the buffer | | Ctrl+(Left/Right) | Moves to previous/next word like when not in copy mode | | Ctrl+F3, Ctrl+F3 | Start incremental search in copy mode | | F3/Shift+F3 | Search next/previous (Note, if you use gnome-terminal it may override this) |
* When bolded/cyan the key is for when in copy mode - Start the session on the current bash directory
- Escape time is lowered for quicker response to copy mode access
To use this, save the file to ~/.tmux.conf
#Mouse interaction
set -g mouse on

#Lower escape timing from 500ms to 50ms for quicker response to copy-mode access
set -s escape-time 50

#Window always takes up largest possible max size
set-window-option -g aggressive-resize

#Highlight active window in tab-bar at bottom in cyan
set-window-option -g window-status-current-style bg=cyan

#Reorder windows in status bar by drag & drop
bind-key -n MouseDrag1Status swap-window -t=

#Copy to clipboard on text selection
bind -Tcopy-mode MouseDragEnd1Pane { send -X copy-selection-and-cancel; run-shell -b "tmux show-buffer | xclip -selection clipboard" }

#Paste from clipboard with right click
bind-key -n MouseDown3Pane { run-shell 'tmux set-buffer -b winclip "$(xclip -o -selection clipboard)"'; paste-buffer -db winclip }

#Middle drag runs copy (Since some programs like nano take control of the mouse for normal selection)
bind -n MouseDrag2Pane copy-mode -M
bind -Tcopy-mode MouseDragEnd2Pane { send -X copy-selection-and-cancel; run-shell -b "tmux show-buffer | xclip -selection clipboard" }
bind-key -n MouseDown2Pane run-shell -b "echo '' > /dev/null"

#Remap prefix to Control+a
set -g prefix C-a
unbind C-b
#bind 'C-a C-a' to type 'C-a'
bind C-a send-prefix

#Start in CWD when creating or splitting tabs; move the splitting planes keys to | and -
bind '|' split-window -h -c '#{pane_current_path}'  # Split panes horizontal
bind '\' split-window -h -c '#{pane_current_path}'  # Split panes horizontal
bind '-' split-window -v -c '#{pane_current_path}'  # Split panes vertically
bind c new-window -c '#{pane_current_path}' # Create new window
unbind '"'
unbind %

#Select next/prev window with Ctrl+Shift+Alt+(Left|Right)
bind-key -n C-S-M-Right next-window
bind-key -n C-S-M-Left previous-window

#Reorder panes with Alt+arrow
bind-key -n M-Left swap-pane -t '{left-of}' -d
bind-key -n M-Right swap-pane -t '{right-of}' -d
bind-key -n M-Up swap-pane -t '{up-of}' -d
bind-key -n M-Down swap-pane -t '{down-of}' -d

#Switch panes using Ctrl+shift+arrow - I rather would have used Ctrl+arrow, but that can interfeer with other programs like nano
bind -n C-S-Left select-pane -L
bind -n C-S-Right select-pane -R
bind -n C-S-Up select-pane -U
bind -n C-S-Down select-pane -D

#Resize panes using Alt+Shift+arrow
bind-key -n M-S-Up resize-pane -U 1
bind-key -n M-S-Down resize-pane -D 1
bind-key -n M-S-Left resize-pane -L 1
bind-key -n M-S-Right resize-pane -R 1

#Ctrl+F3 starts searching in copy mode
bind -n C-F3 { copy-mode; command-prompt -T search -ip'(search down)' -I'#{pane_search_string}' { send -X search-forward-incremental '%%' } }

#prefix, / -- Renames window, but starts blank
bind-key / command-prompt "rename-window '%%'"

#---Copy mode---

#Enter key in copy mode copies to clipboard and ends copy mode
bind-key -Tcopy-mode Enter { send -X copy-selection-and-cancel; run-shell -b "tmux show-buffer | xclip -selection clipboard" }
#Ctrl+PageUp = Copy mode, scroll page up
bind-key -n C-PageUp copy-mode -u
#Ctrl+PageDown = Copy mode
bind-key -n C-PageDown copy-mode
#Shift+Left = Start selection mode on previous character (if selection mode is active, do not restart selection)
bind-key -Tcopy-mode S-Left { run-shell "tmux display-message -p \"#{selection_active}\" | awk '{print ($0 == 1) ? \"\" : \"tmux send -X begin-selection\"}' | sh"; send -X cursor-left }
#Shift+Right = Start selection mode on current character (if selection mode is active, do not restart selection)
bind-key -Tcopy-mode S-Right { run-shell "tmux display-message -p \"#{selection_active}\" | awk '{print ($0 == 1) ? \"\" : \"tmux send -X begin-selection\"}' | sh"; send -X cursor-right }
#Escape = If something is selected, end current selection. Otherwise, exit copy mode.
bind-key -Tcopy-mode Escape run-shell "tmux display-message -p \"#{selection_active}\" | awk '{print ($0 == 1) ? \"tmux send -X clear-selection\" : \"tmux send -X cancel\"}' | sh"
#Ctrl+Home = Go to top of buffer
bind-key -Tcopy-mode C-Home send -X history-top
#Ctrl+End = Go to bottom of buffer
bind-key -Tcopy-mode C-End send -X history-bottom
#Ctrl+Left = Previous work
bind-key -Tcopy-mode C-Left send -X previous-word
#Ctrl+Right = Next work
bind-key -Tcopy-mode C-Right send -X next-word
#Ctrl+F3 = Start incremental search
bind -Tcopy-mode C-F3 { command-prompt -T search -ip'(search down)' -I'#{pane_search_string}' { send -X search-forward-incremental '%%' } }
#F3 = Search next (Note, if you use gnome-terminal it may override this)
bind -Tcopy-mode F3 send -X search-again
#Shift+F3 = Search previous (Note, if you use gnome-terminal it may override this)
bind -Tcopy-mode S-F3 send -X search-reverse
|
|
2
on: May 12, 2025, 07:06:12 pm
|
|
Started by Dakusan - Last post by Dakusan
|
The following are the steps to take a screenshot without overlays inside Google Maps Street View or Google Maps. - Collapse the left side window if visible with the arrow
- Press F11 to go full screen
- Open up the dev console [F12]
Optional: You may need to open the dev console in another window (undocked). Leaving it docked with the window could cause problems. - Run the following command in the dev console:
document.querySelectorAll('*').forEach(el => el.style.display='none');
for(let c=document.getElementsByTagName('canvas')[0];c.parentNode;c=c.parentNode) c.style.display='';
This should be pretty foolproof, but you may need to change the [0] to another number if the primary canvas element isn't the first canvas.
If that doesn't work, you can also try the following, which is a bit more specialized, but may not catch all the elements on the screen (including the Google logo).
document.querySelectorAll('[jsaction^="mouseover:"],[jsaction^="mouseout:"],button,[role="navigation"],.scene-footer-container,#omnibox-container,[aria-label="Sign in"],[aria-label="Google apps"]')
   .forEach(el => el.style.display = 'none');
document.querySelectorAll('[aria-label="Interactive map"]').forEach(el => el.parentNode.style.display='none');
- Close the dev console (or Alt+tab back to the chrome window if undocked)
- Move the mouse to the sky (or a portion that won't trigger possible popups)
- Wait for a few seconds for icons to disappear
- Take screenshot
|
|
3
on: March 11, 2025, 06:09:06 pm
|
|
Started by Dakusan - Last post by Dakusan
|
You served me well for 15 years. 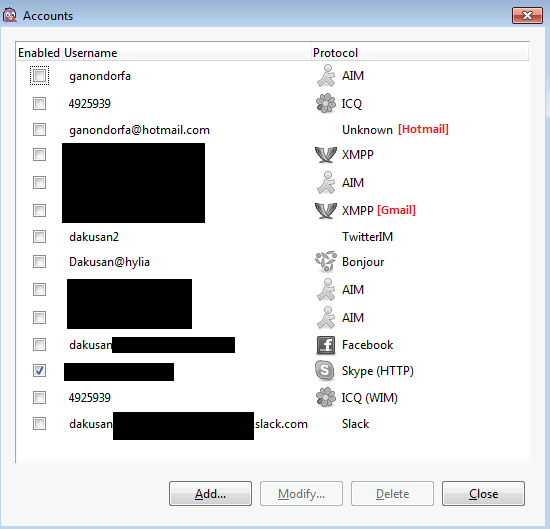 |
|
4
on: February 17, 2025, 11:47:54 pm
|
|
Started by Dakusan - Last post by Dakusan
|
|
My script actually just caught a change, and fortunately one that I am very happy with. (I had of course already removed the "home" file permission when I first installed it).
io.github.ungoogled_software.ungoogled_chromium: Permission changes:
  [Context]
    + filesystems = xdg-run/pipewire-0;~/.local/share/icons:create;xdg-download;xdg-desktop;~/.local/share/applications:create
    - filesystems = home
  [Environment]
    - LD_LIBRARY_PATH = /app/chromium/nonfree-codecs/lib
  [Extension io.github.ungoogled_software.ungoogled_chromium.Codecs]
    - directory = chromium/nonfree-codecs
    - autodelete = true
    - add-ld-path = lib
  [Build]
    - built-extensions = io.github.ungoogled_software.ungoogled_chromium.Codecs
|
|
5
on: December 20, 2024, 01:29:29 pm
|
|
Started by Dakusan - Last post by Dakusan
|
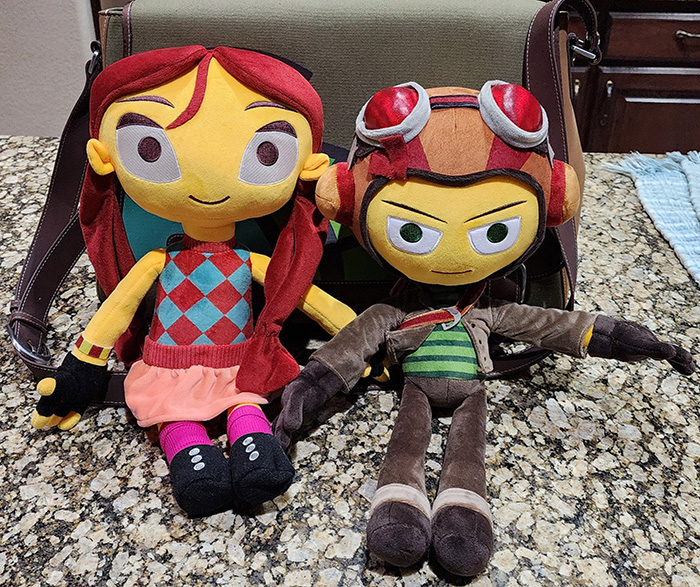
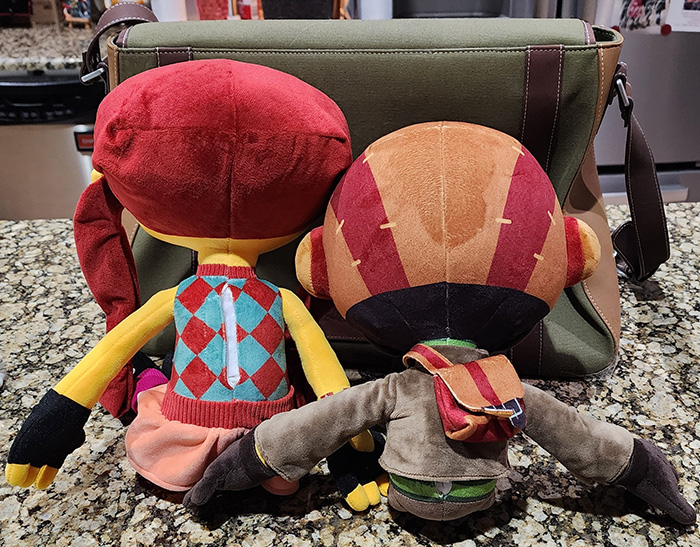
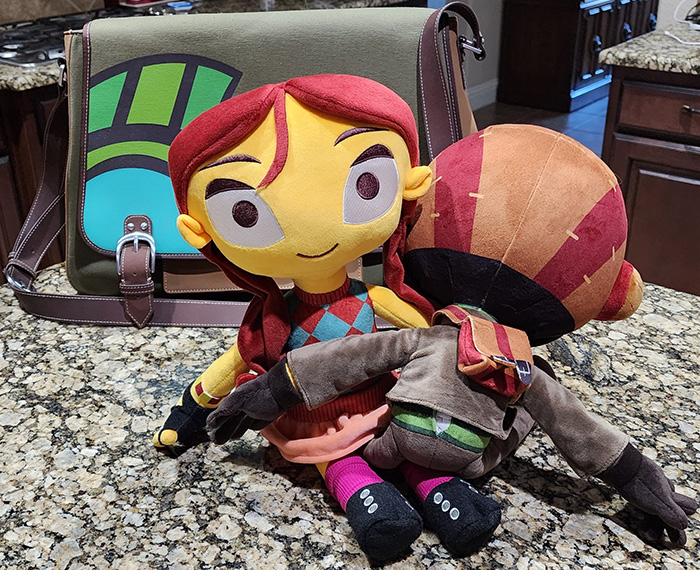
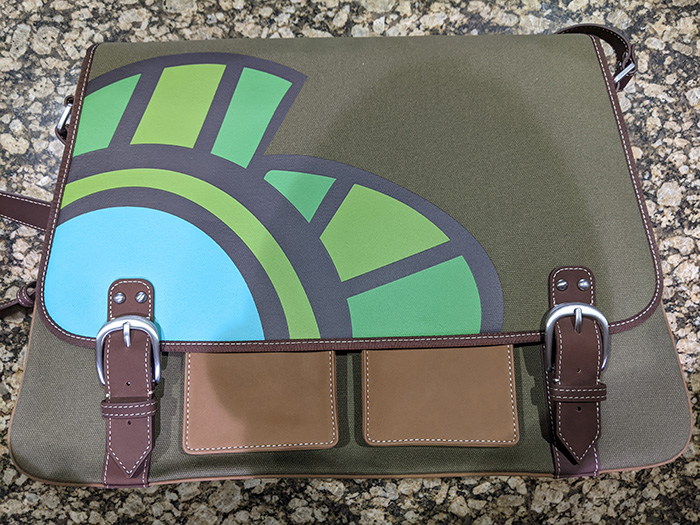
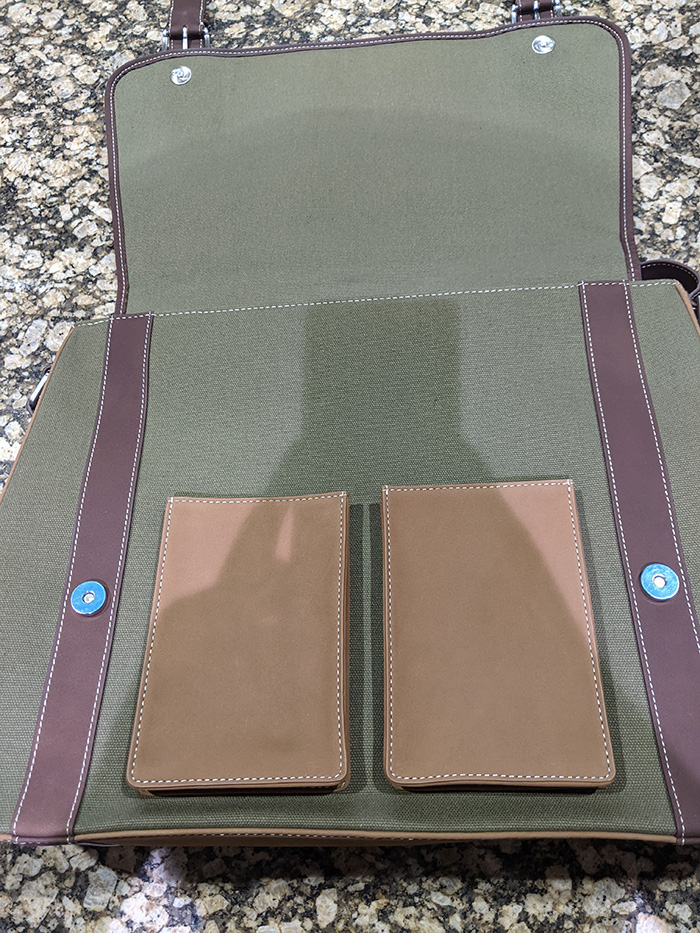
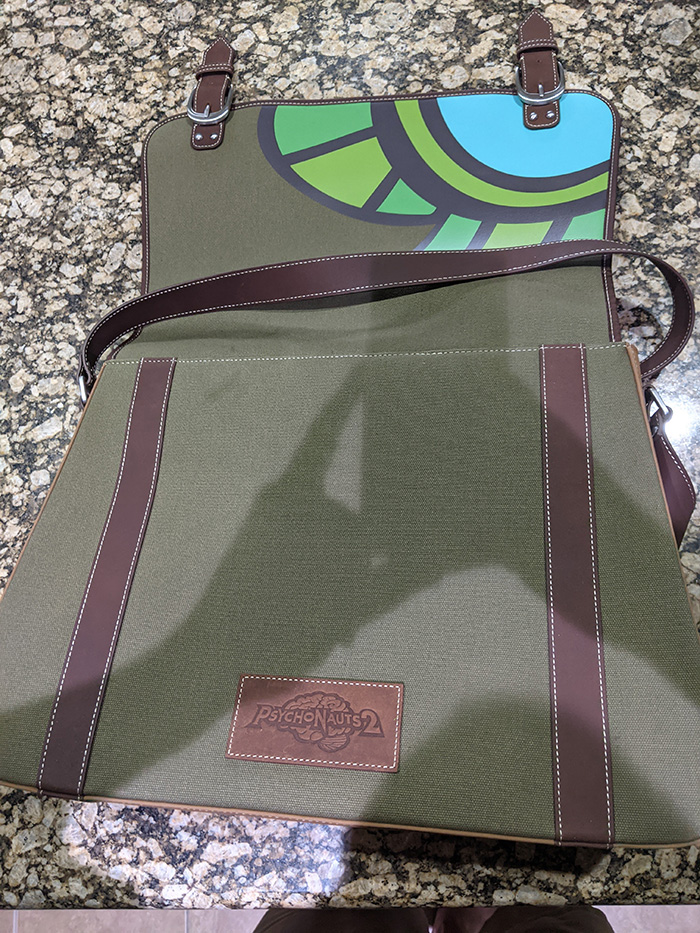
I finally got my Raz and Lili plushies in from the Psychonauts 2 campaign, NINE YEARS LATER. They’re pretty cute and I really like them, though Lilis’ has a lot of flaws. Her blouse colors are way off and the triangle pattern is much larger than in the game. Her skirt is also only 1 color instead of 2. All in all not that big a deal. Something that really urks me about it though is that they were supposed to be CAMPAIGN EXCLUSIVES that I paid $100 for each. But then Double Fine went and sold them online for $40 a pop. They already lost my good faith from the “Backpack” campaign reward debacle 4 years ago. It wasn’t the backpack from the first game with the badges. It was the new satchel design from the second game, which is NOT what was promised. I paid $300 bucks for it and its definitely supposed to be the bag from #1 if its supposed to include the merit badges... Granted, the quality was very nice though.
|
|
6
on: December 20, 2024, 11:30:22 am
|
|
Started by Dakusan - Last post by Dakusan
|
I updated the Checking permissions before updating Flatpaks post with the following changes: - Split post into the following sections:
- My final updated copy of the script
- List of the changes I made from the AI produced script
- The commands I gave the AI
- The final script the AI produced
- Made more updates to the final script:
- Added “askQuestion” function since there are now multiple places in the script that ask questions
- Added $NoNewline to outputColor (for “askQuestion” function)
- Changed get-updates command from “flatpak remote-ls --updates” to “echo n | flatpak update” (with a regex extraction). Also now confirms the update list with the user.
|
|
7
on: December 07, 2024, 02:25:44 am
|
|
Started by Dakusan - Last post by Dakusan
|
Listening to music when working to drown out everything but what I’m concentrating on has long been the way I’ve done things, and sound quality is important to me. When I’ve had housemates, I always used my Sennheiser HD 650 Open Back headphones along with an RME Babyface Pro for custom wave tuning. To perfectly tune the waveforms so it sounded the best to me, I spent many hours listening to the same sound clips over and over, ones that I’d already heard thousands of times before and knew impeccably. Now that I’ve had my house to myself for a while, I always listen to everything through surround sound (I have my house wired for 7.1 in my office, living room, and bedroom). While the sound quality is a pretty big step down, I really enjoy being immersed in the music, coming in from all directions. Any headphones I’ve tried just can’t simulate that experience. I generally just listen to stereo tracks that are upmixed (upmuxed?) to 7.1, which gives me what I want. Actual surround sound music tracks are rare, and it’s even more rare that they are actually good. In 1996 there were 5 Eva (Neon Genesis Evangelion) OST CDs released, and in December of 2004 they were rereleased with 5.1 surround editions. I have acquired copies of the first 3 of these CDs and the surround mixes are phenomenal. I’ve been saddened by the fact I don’t have the 5th CD (I’ve found a physical copy online I intend to grab soon) as it contains one of my favorite Eva songs, “Komm, süsser Tod”. It recently came to my attention that there was a “Neon Genesis Evangelion 5.1ch Surround Edition Soundtrack” released in 2015 that has that song and I finally acquired it today. Unfortunately, the surround remix on this CD is horrible and I deleted it after listening all the way through. Very disappointing. Another fun tidbit. I’ve lost a good deal of my hearing ranges from playing percussion in instrumental band in high school. I recently went to an audiologist and tried out hearing aids and HOLY CRAP, everything in life suddenly sounds so much better and crisper. The Oticon Intent hearing aids are absolutely amazing. The best versions (#1) definitely give the best quality. The lowest tier version (#3) didn’t cut it for me. I’m probably going to settle with the mid-tier version (#2) due to price vs quality loss. Using these hearing aids is a huge step for me in bridging the gap to listening to music out loud and through my Sennheisers. And what really surprised me was that using the hearing aids actually enhanced the sound quality when listening through my Sennheisers. To adjust the hearing aids to my needs I went through a 10-ish minute test in a sound booth in which all the ranges of my hearing were testing, so the hearing aids could boost the different ranges to match my hearing loss. What really made me smile was when I compared the hearing range loss chart with the waveform I came up with for my Babyface. They were almost exactly matched. Which tells me I haven’t lost much more hearing in the last decade. |
|
8
on: November 26, 2024, 05:00:54 pm
|
|
Started by Dakusan - Last post by Dakusan
|
|
One other note I wanted to add. Trying to LUKS encrypt your boot partition comes with its own caveats. Grub bootloader decryption (before initramfs loads) is SLOW. Like... 20 seconds to test a password on modern hardware due to iteration counts and low level bootloaders not having access to certain CPU functions that would speed up the process. Also, if you mistype the password, you may have to reboot.
|
|
9
on: November 21, 2024, 11:39:33 pm
|
|
Started by Dakusan - Last post by Dakusan
|
In honor of my recent Sekiro accomplishment, I bought myself a cute little Sekiro letter opener sword to go on my office side desk. I honestly think I may consider Sekiro the best first player game ever made. It’s by far better than any of From Softwares’ other games (I am a big Dark Souls fan. Elden ring was boringly easy). I had been trying to do a perfect run for about a month and finally got it done. In 10.5 hours I killed every enemy exactly once (no more, no less), 0 death screens, no cheese, no exiting battles, bought out all vendors, and collected all items. It was a lot of fun. One of the reasons I love Sekiro so much is that it’s about the zen perfection of a specific skill set, patience, timing, and reaction speed (I am also a big fan of Super Hexagon - almost have a 4 minute run on it). There is no experience grinding to get past bosses, though certain skills acquired through exp are extremely helpful. This makes it harder than dark souls, and winning gives much more of an accomplishment feeling. It goes far beyond that though. The level design is top notch and art assets are visually stunning. It’s an integrated cohesive world more so than any of the Dark Souls, and I’m a bit of a sucker for Japanese themes. Combat is wonderful. Pretty much all the fights are fun and fair once you learn how to play, and you can even freaking pause the game! :-D You have to keep on your toes at all times cause ANYONE can kill you. The game both lets you sneak or just run in and murder everything if you’re good enough. The replayability is much higher than any of the other FromSoft souls like games too. 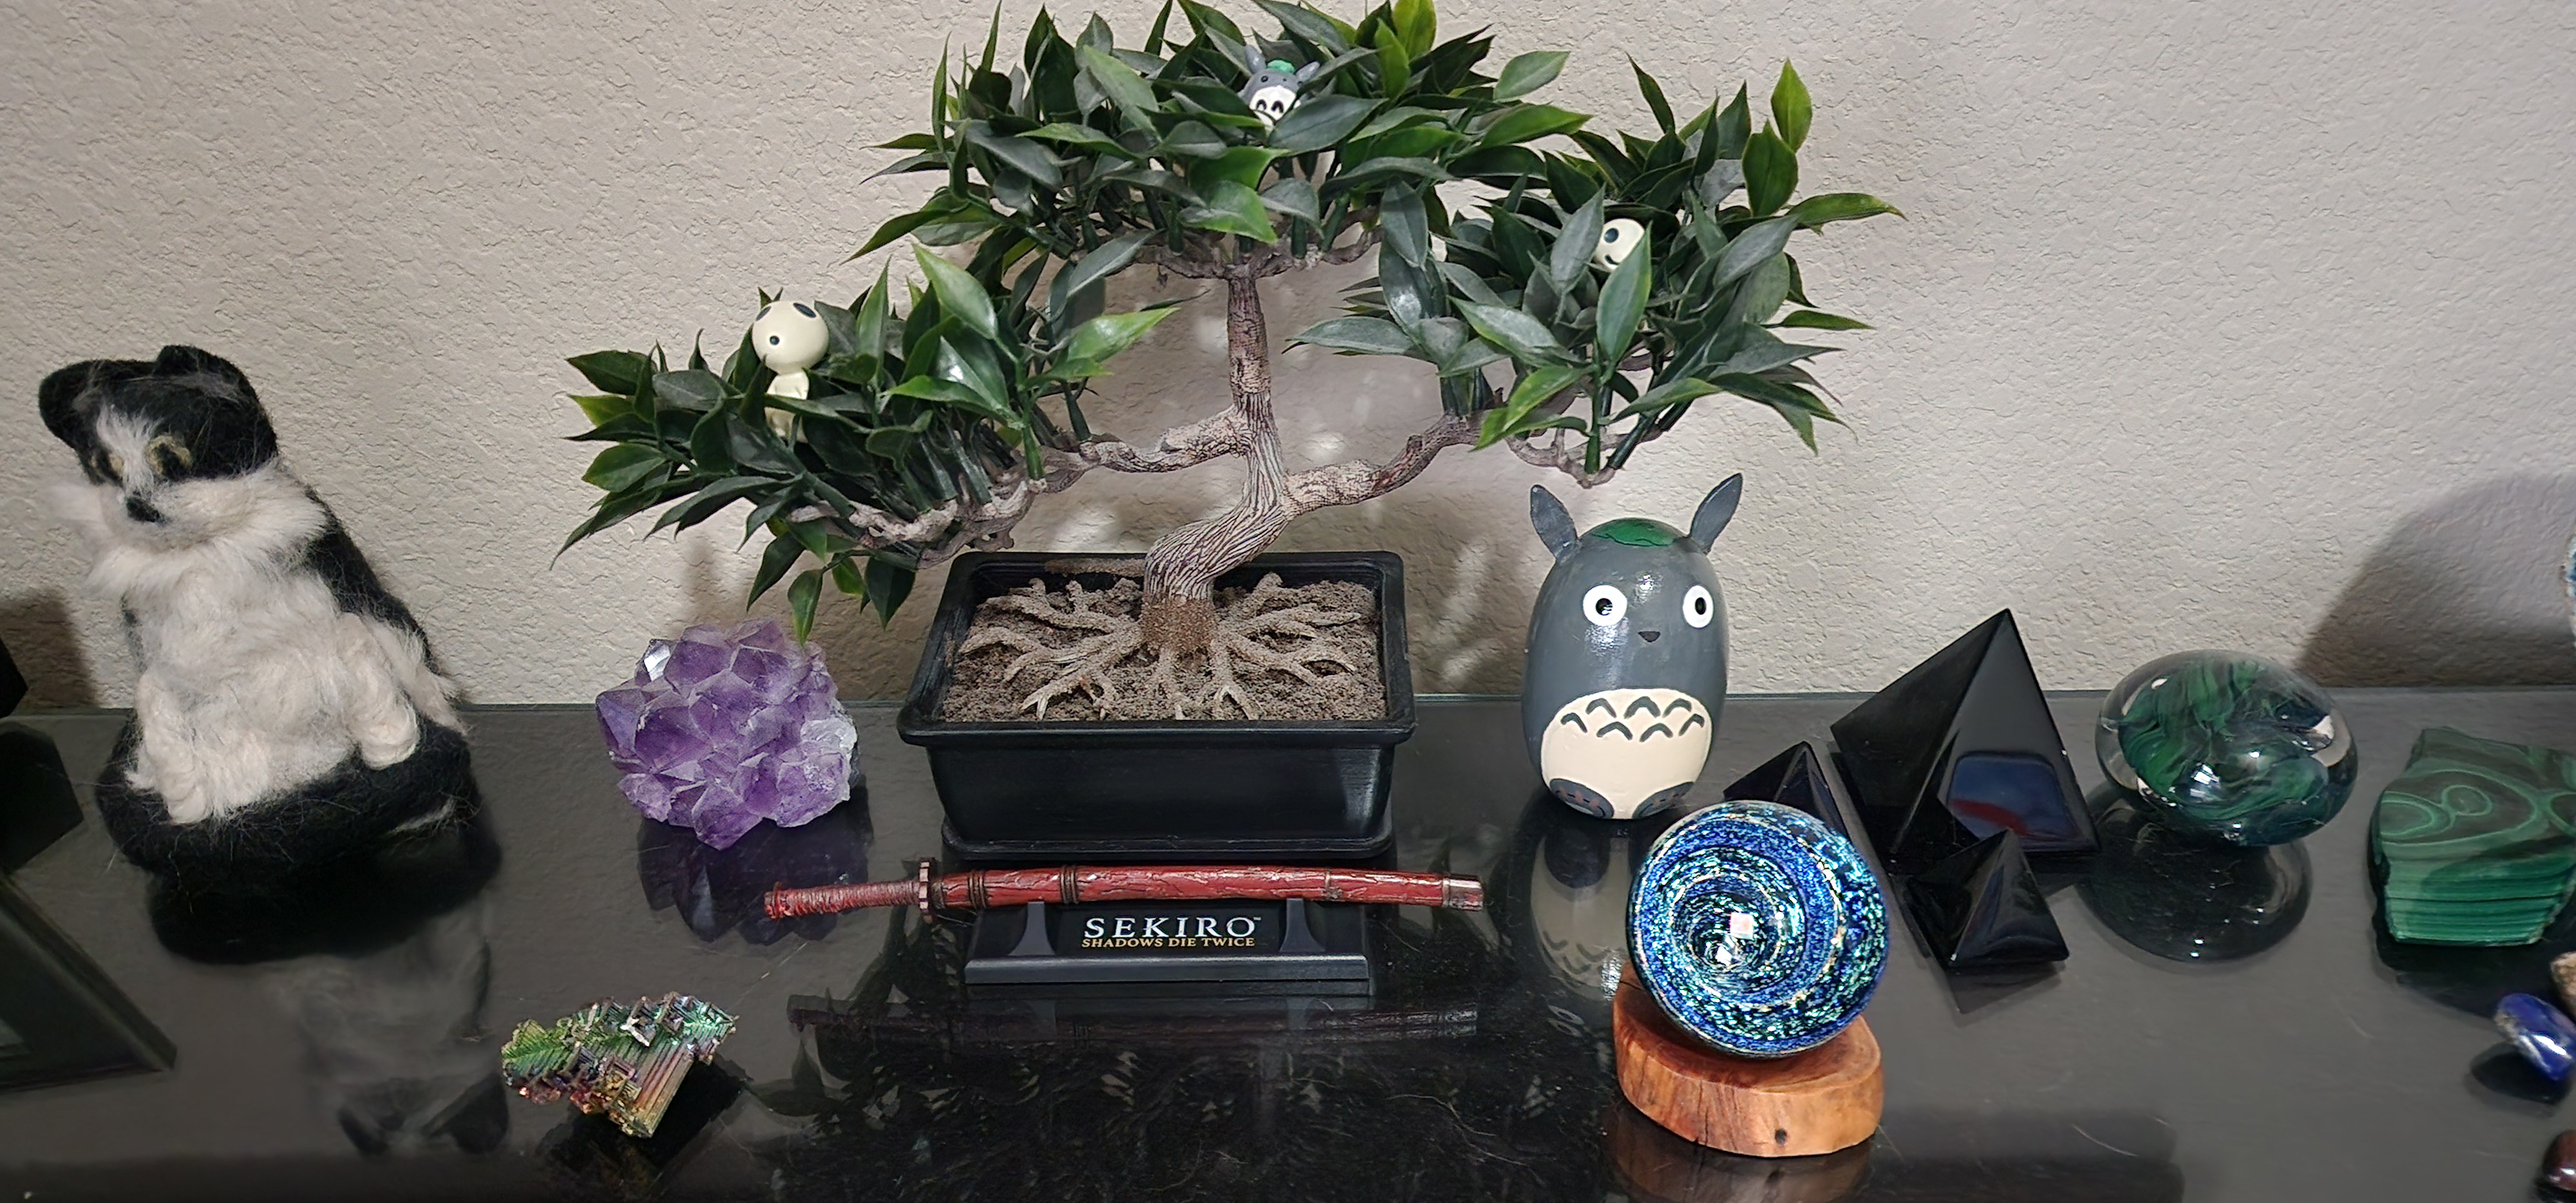 |
|
10
on: November 20, 2024, 10:12:14 pm
|
|
Started by Dakusan - Last post by Dakusan
|
I recently moved to Linux and have all my hard drives Luks encrypted, including the primary. I decided to convert my ext4 partitions to Btrfs recently, which I’m totally loving. I also decided to grab another nvme drive and use it as a RAID1 (mirror) drive against my primary drive, using Btrfs’ RAID mechanics. Below are the instructions to accomplish this. Do note that this is for a situation where you already have a BTRFS volume and want to add a device as RAID1. This assumes you already have your system booting to the LUKS encrypted drive with the root being btrfs. Many modern Linux OS installers can do this for you automatically. Parts of these instructions can still be used in other situations. - Hopefully you also have a swap partition under the same LVM as your LUKS root (the Linux Mint installer does this by default), as we’ll be using it. If not, you’ll need to modify the instructions. This script resizes the swap partition and adds an “extra” partition to hold your drive key. This is required because a drive key cannot be loaded off your btrfs volume as both drives need to be unlocked first.
- This should be ran from another operating system. I would recommend using Universal USB Installer to do this. It allows you to put multiple OS live cds on a USB key, including optional persistence.
- Run the following script as root (you can use sudo). Make sure to fill in the variables section first. Or even better, run the script 1 line at a time to make sure there are no problems.
#!/bin/bash
#-----------------------------------Variables----------------------------------
#Current root drive
CurPart="nvme0n1p3" #The current drive partition in /dev. This example uses nvme disk #0 partition #3
CurCryptVol="vgmint" #What you named your LVM under LUKS
CurCryptRoot="root" #What you named your root partition under the LVM
CurCryptRootSubVol="/" #The path of the subvolume that is used as the root partition. For example, I use “@”
CurCryptSwap="swap_1" #What you named your swap partition under the LVM
CurCryptExtra="extra" #What you WANT to name your extra partition under the LVM
CurCryptExtraSize="100M" #How big you want your extra partition that will hold your key file
CurKeyPath="" #The path to a key file that will unlock both drives. If left blank then one will be created

#New drive
NewDrive="nvme1n1" #The new drive in /dev. This example uses nvme disk #1
NewPart="nvme1n1p3" #The new partition in /dev. You will be creating this with the cfdisk. This example uses nvme disk#1 partition#3
NewCryptName="raid1_crypt" #What we’ll name the root LUKS partition (no LVM)

#Other variables you do not need to set
CurMount="/mnt/primary"
ExtraMountPath="$CurMount/mnt/extra"
BtrfsReleasePath="kdave/btrfs-progs"
BtrfsReleaseFile="btrfs.box.static"
DriveKeyName="drivekey"

echo "---------------------------------Update BTRFS---------------------------------"
echo "Make sure you are using the latest btrfs-progs"
cd "$(dirname "$(which btrfs)")"
LATEST_RELEASE=$(curl -s "https://api.github.com/repos/$BtrfsReleasePath/releases/latest" | grep tag_name | cut -d \" -f4)
wget "https://github.com/$BtrfsReleasePath/releases/download/$LATEST_RELEASE/$BtrfsReleaseFile"
chmod +x "$BtrfsReleaseFile"

echo "Link all btrfs programs to btrfs.box.static. Rename old files as .old.FILENAME"
if ! [ -L ./btrfs ]; then
  for v in $(\ls btrfs*); do
    if [ "$v" != "$BtrfsReleaseFile" ]; then
      mv "$v" ".old.$v"
      ln -s "$BtrfsReleaseFile" "$v"
    fi
  done
fi

echo "--------------------------Current drive and key setup-------------------------"
echo "Mount the current root partition"
cryptsetup luksOpen "/dev/$CurPart" "$CurCryptVol"
vgchange -ay "$CurCryptVol"
mkdir -p "$CurMount"
mount -o "subvol=$CurCryptRootSubVol" "/dev/$CurCryptVol/$CurCryptRoot" "$CurMount"

echo "If the extra volume has not been created, then resize the swap and create it"
if ! [ -e "/dev/$CurCryptVol/$CurCryptExtra" ]; then
  lvremove -y "/dev/$CurCryptVol/$CurCryptSwap"

  lvcreate -n "$CurCryptExtra" -L "$CurCryptExtraSize" "$CurCryptVol"
  mkfs.ext4 "/dev/$CurCryptVol/$CurCryptExtra"

  lvcreate -n "$CurCryptSwap" -l 100%FREE "$CurCryptVol"
  mkswap "/dev/$CurCryptVol/$CurCryptSwap"
fi

echo "Make sure the key file exists, if it does not, either copy it (if given in $CurKeyPath) or create it"
mkdir -p "$ExtraMountPath"
mount "/dev/$CurCryptVol/$CurCryptExtra" "$ExtraMountPath"
if ! [ -e "$ExtraMountPath/$DriveKeyName" ]; then
  if [ "$CurKeyPath" != "" ]; then
    if ! [ -e "$CurKeyPath" ]; then
      echo "Not found: $CurKeyPath"
      exit 1
    fi
    cp "$CurKeyPath" "$ExtraMountPath/$DriveKeyName"
  else
    openssl rand -out "$ExtraMountPath/$DriveKeyName" 512
  fi
  chmod 400 "$ExtraMountPath/$DriveKeyName"
  chown root:root "$ExtraMountPath/$DriveKeyName"
fi

echo "Make sure the key file works on the current drive"
if cryptsetup --test-passphrase luksOpen --key-file "$ExtraMountPath/$DriveKeyName" "/dev/$CurPart" test; then
  echo "Keyfile successfully opened the LUKS partition."
  #cryptsetup luksClose test #This doesn’t seem to be needed
else
  echo "Adding keyfile to the LUKS partition"
  cryptsetup luksAddKey "/dev/$CurPart" "$ExtraMountPath/$DriveKeyName"
fi

echo "--------------------------------New drive setup-------------------------------"
echo "Use cfdisk to set the new disk as GPT and add partitions."
echo "Make sure to mark the partition you want to use for the raid disk as type “Linux Filesystem”."
echo "Also make it the same size as /dev/$CurPart to avoid errors"
cfdisk "/dev/$NewDrive"

echo "Encrypt the new partition"
cryptsetup luksFormat "/dev/$NewPart"

echo "Open the encrypted partition"
cryptsetup luksOpen "/dev/$NewPart" "$NewCryptName"

echo "Add the key to the partition"
cryptsetup luksAddKey "/dev/$NewPart" "$ExtraMountPath/$DriveKeyName"

echo "Add the new partition to the root btrfs file system"
btrfs device add "/dev/mapper/$NewCryptName" "$CurMount"

echo "Convert to RAID1"
btrfs balance start -dconvert=raid1 -mconvert=raid1 "$CurMount"

echo "Confirm both disks are in use"
btrfs filesystem usage "$CurMount"

echo "--------------------Booting script to load encrypted drives-------------------"
echo "Get the UUID of the second btrfs volume"
Drive2_UUID=$(lsblk -o UUID -d "/dev/$NewPart" | tail -n1)

echo "Create a script to open your second luks volumes before mounting the partition"
echo "Note: In some scenarios this may need to go into “scripts/local-premount” instead of “scripts/local-bottom”"
cat <<EOF > "$CurMount/etc/initramfs-tools/scripts/local-bottom/unlock_drive2"
#!/bin/sh
PREREQ=""

prereqs()
{
    echo "\$PREREQ"
}

case "\$1" in
    prereqs)
        prereqs
        exit 0
        ;;
esac

. /scripts/functions
cryptroot-unlock
vgchange -ay "$CurCryptVol"
mkdir -p /mnt/keyfile
mount "/dev/$CurCryptVol/$CurCryptExtra" /mnt/keyfile
cryptsetup luksOpen /dev/disk/by-uuid/$Drive2_UUID "$NewCryptName" "--key-file=/mnt/keyfile/$DriveKeyName"
umount /mnt/keyfile
rmdir /mnt/keyfile

mount -t btrfs -o "subvol=$CurCryptRootSubVol" "/dev/$CurCryptVol/$CurCryptRoot" /root

#If you are weird like me and /usr is stored elsewhere, here is where you would need to mount it.
#It cannot be done through your fstab in this setup.
#mount --bind /root/sub/sys/usr /root/usr

mount --bind /dev /root/dev
mount --bind /proc /root/proc
mount --bind /sys /root/sys
EOF

chmod 755 "$CurMount/etc/initramfs-tools/scripts/local-bottom/unlock_drive2"

echo "--------------------Setup booting from the root file system-------------------"
echo "Prepare a chroot environment"
for i in dev dev/pts proc sys run tmp; do
  mount -o bind /$i "$CurMount/$i"
done

echo "Run commands in the chroot environment to update initramfs and grub"
chroot "$CurMount" <<EOF
echo "Mount the other partitions (specifically for “boot” and “boot/efi”)"
mount -a

echo "Update initramfs and grub"
update-initramfs -u -k all
update-grub
EOF

echo "-----------------------------------Finish up----------------------------------"
echo "Reboot and pray"
reboot
|
|
|